Managing software on Ubuntu 26.04 Resolute Raccoon starts with mastering APT, the Advanced Package Tool. Whether you are installing your first package or managing complex repository configurations, APT is the primary tool you will use on a daily basis. Ubuntu 26.04 ships APT 3.1.16 with several notable improvements to APT package management, including solver3 as the default dependency resolver, the modern DEB822 source format, new diagnostic subcommands like apt why and apt why-not, repository-level package filtering with Include/Exclude, and the apt modernize-sources migration tool. In this guide, you will learn how to use essential and advanced apt commands, manage repositories, understand the DEB822 format, and troubleshoot common issues on your Ubuntu 26.04 system.
In this tutorial you will learn:
- How to use essential APT commands to install, remove, update, and search for packages
- How to manage repositories using the DEB822 .sources format
- How to convert legacy sources with
apt modernize-sources - How to use the default solver3 dependency resolver and revert to the classic solver
- How to query why a package is or is not installed with
apt whyandapt why-not - How to pin packages, hold versions, and manage the APT cache
- How to troubleshoot common APT errors
Software Requirements
| Category | Requirements, Conventions or Software Version Used |
|---|---|
| System | Ubuntu 26.04 Resolute Raccoon |
| Software | APT 3.1.16 (pre-installed) |
| Other | Privileged access to your Linux system as root or via the sudo command. |
| Conventions | # – requires given linux commands to be executed with root privileges either directly as a root user or by use of sudo command$ – requires given linux commands to be executed as a regular non-privileged user |
apt for day-to-day package operations, manage repositories in the DEB822 .sources format, and take advantage of features like the default solver3 dependency resolver, apt why / apt why-not diagnostics, repository-level Include/Exclude filtering, and apt modernize-sources.
| Step | Command/Action |
|---|---|
| 1. Update package index | $ sudo apt update |
| 2. Install a package | $ sudo apt install package-name |
| 3. Upgrade all packages | $ sudo apt upgrade |
| 4. Remove a package | $ sudo apt remove package-name |
Understanding APT on Ubuntu 26.04
APT (Advanced Package Tool) is the core package management system for Ubuntu and other Debian-based distributions. It handles downloading, installing, upgrading, and removing .deb packages while automatically resolving dependencies. On Ubuntu 26.04, APT remains the primary way to manage system software alongside Snap packages and optionally Flatpak.
apt vs apt-get
You may encounter both apt and apt-get in tutorials and documentation. The apt command was introduced as a more user-friendly frontend that combines the most commonly used features of apt-get and apt-cache into a single tool. The apt command provides colored output, a progress bar during installation, and simpler syntax for everyday operations. Consequently, apt is the recommended tool for interactive use on Ubuntu 26.04.
The apt-get command remains available and is still preferred in scripts because its output format is more stable across versions. For all interactive tasks covered in this guide, we will use the apt command.
What’s New in APT on Ubuntu 26.04
Ubuntu 26.04 ships with APT 3.1.16, which introduces several important changes. For a detailed exploration of every new feature, see our dedicated What Is New in APT 3.1 on Ubuntu 26.04 article. Here is a summary:
- solver3 is the default – The new dependency resolver is now enabled by default for all
aptCLI operations. It uses a SAT-solver-inspired approach that produces faster and more predictable results than the classic resolver. - DEB822 source format by default – Repository sources are now configured in
.sourcesfiles using the structured DEB822 format rather than the legacy one-line.listformat. apt whyandapt why-not– New diagnostic subcommands that explain why a package is or is not selected for installation, using solver3’s decision trace.- Repository filtering with
Include/Exclude– New DEB822 source-file options that let you allowlist or denylist specific packages from a repository without complex pinning rules. apt modernize-sources– A migration tool that converts legacy.listfiles to the DEB822.sourcesformat automatically.- Stricter cryptographic policies – DSA keys and RSA keys smaller than 2048 bits are rejected, and keyring filenames in
/etc/apt/trusted.gpg.d/must follow run-parts naming rules.
Essential APT Commands for Ubuntu 26.04
This section covers the fundamental apt package management commands you will use most frequently on Ubuntu 26.04. Every package operation begins with updating the local package index so that APT knows about the latest available versions.
Updating the Package Index
Before installing or upgrading packages, always refresh the local package index. This downloads the latest package lists from all configured repositories:
$ sudo apt update

This command contacts each repository defined in your /etc/apt/sources.list.d/ directory and downloads the current package metadata. Therefore, you should run this command regularly, especially before installing new software.
Installing Packages
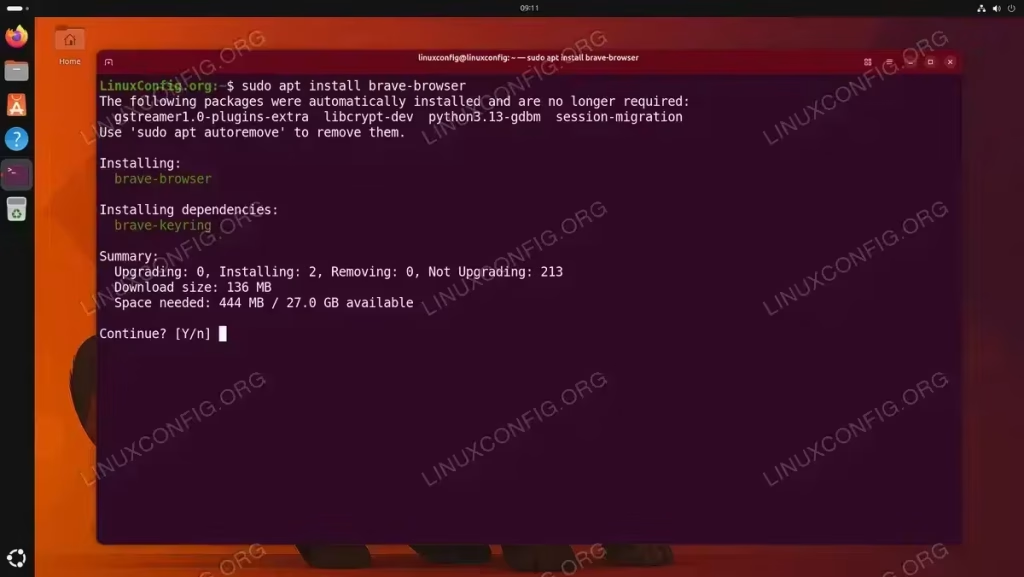
To install a package, use the apt install command followed by the package name. APT will automatically resolve and install any required dependencies:
$ sudo apt install package-name
You can install multiple packages in a single command by listing them separated by spaces:
$ sudo apt install vim curl wget
To install a specific version of a package, append the version number with an equals sign:
$ sudo apt install package-name=version
TIP
If you are unsure of the exact package name, use apt search (covered below) to find it first. Package names in Ubuntu are case-sensitive and typically use lowercase letters with hyphens.
Removing Packages
APT provides two ways to remove packages. The remove command uninstalls the package but keeps its configuration files:
$ sudo apt remove package-name
To remove a package along with all its configuration files, use purge instead:
$ sudo apt purge package-name
After removing packages, some dependencies that were automatically installed may no longer be needed. Clean them up with:
$ sudo apt autoremove
Upgrading Packages
To upgrade all installed packages to their latest available versions, first update the index and then run the upgrade:
$ sudo apt update
$ sudo apt upgrade
The upgrade command will never remove an existing package. If a package upgrade requires removing another package due to a dependency change, that package will be held back. To allow such removals, use full-upgrade:
$ sudo apt full-upgrade
The full-upgrade command is particularly important during distribution upgrades, where dependency changes are more common.
Searching for Packages
To search for packages by name or description, use the apt search command:
$ apt search keyword
Note that apt search does not require sudo privileges because it only reads from the local package cache. The search is case-insensitive and matches against both package names and descriptions.
To display detailed information about a specific package, including its version, dependencies, size, and description, use:
$ apt show package-name
Listing Packages
To list all installed packages on your system:
$ apt list --installed
To list packages that have upgrades available:
$ apt list --upgradable
To list all available versions of a specific package:
$ apt list -a package-name

Managing Repositories and Software Sources
Repositories are remote servers that host collections of .deb packages. Ubuntu 26.04 is configured out of the box with the official Ubuntu repositories, but you may need to add third-party repositories to access additional software. Understanding how repository sources are structured on Ubuntu 26.04 is essential for effective apt package management.
Repository Source Files on Ubuntu 26.04
On Ubuntu 26.04, repository sources are stored in the /etc/apt/sources.list.d/ directory. The primary system source file is:
/etc/apt/sources.list.d/ubuntu.sources
This file uses the DEB822 format (covered in detail in the next section). Unlike older Ubuntu versions that used a single /etc/apt/sources.list file with one-line entries, Ubuntu 26.04 organizes sources into individual .sources files within the sources.list.d directory.
IMPORTANT
The legacy /etc/apt/sources.list file may still exist on your system but should be empty or absent on a fresh Ubuntu 26.04 installation. All repository configuration should go in /etc/apt/sources.list.d/ using .sources files.
Adding a Third-Party Repository
To add a third-party repository on Ubuntu 26.04, you need to create a new .sources file in /etc/apt/sources.list.d/ and import the repository’s GPG signing key. Here is the general process:
- Download the GPG key: Most repositories provide a GPG key for package authentication. Download it and store it in
/usr/share/keyrings/:$ wget -qO- | sudo tee /usr/share/keyrings/example-keyring.gpg > /dev/null
If the key is provided in ASCII-armored format (
.asc), convert it first:$ wget -qO- | sudo gpg --dearmor -o /usr/share/keyrings/example-keyring.gpg
- Create the .sources file: Create a new DEB822 format source file:
$ sudo nano /etc/apt/sources.list.d/example.sources
Add the repository definition:
Types: deb
URIs:
Suites: resolute
Components: main
Signed-By: /usr/share/keyrings/example-keyring.gpg
- Update the package index:
$ sudo apt update
Removing a Repository
To remove a third-party repository, simply delete or rename its .sources file and update the package index:
$ sudo rm /etc/apt/sources.list.d/example.sources
$ sudo apt update
Understanding the DEB822 Source Format on Ubuntu 26.04
Ubuntu 26.04 uses the DEB822 format as the default for APT repository configuration. This format is more readable, structured, and less error-prone than the legacy one-line format. Understanding this format is crucial for apt package management on Ubuntu 26.04.
DEB822 Format Syntax
A DEB822 source entry consists of key-value pairs, one per line. Here is the general structure:
Types: deb deb-src
URIs:
Suites: resolute resolute-updates resolute-security
Components: main restricted universe multiverse
Signed-By: /usr/share/keyrings/ubuntu-archive-keyring.gpg
Each field serves a specific purpose:
- Types – Specifies whether to fetch binary packages (
deb), source packages (deb-src), or both. - URIs – The base URL of the repository. Multiple URIs can be space-separated for mirrors.
- Suites – The distribution codename(s) to use (e.g.,
resolute,resolute-updates). - Components – The repository sections to enable (e.g.,
main,restricted,universe,multiverse). - Signed-By – The path to the GPG keyring used to authenticate packages from this repository.
- Include / Exclude – New in APT 3.1, these optional fields let you allowlist or denylist specific packages from a repository. For example, adding
Include: docker-ce docker-ce-clilimits the repository to only those packages. This is a cleaner alternative to complex APT pinning rules. See What Is New in APT 3.1 on Ubuntu 26.04 for full details.
Examining the Default Ubuntu Sources
To view the default repository configuration on your Ubuntu 26.04 system:
$ cat /etc/apt/sources.list.d/ubuntu.sources

The file may contain multiple entries separated by blank lines. Each entry defines a distinct repository source.
Converting Legacy Sources with apt modernize-sources
If you have upgraded from an older Ubuntu release or added repositories using the legacy one-line .list format, you can convert them to DEB822 format using the apt modernize-sources command:
$ sudo apt modernize-sources
This command scans all legacy .list files in /etc/apt/sources.list.d/ and the deprecated /etc/apt/sources.list file, then converts them to equivalent .sources files. The original .list files are preserved with a backup extension.

TIP
Run sudo apt modernize-sources after upgrading to Ubuntu 26.04 from an older release to ensure all your repository configurations use the current DEB822 format.
Using the APT Solver3 on Ubuntu 26.04
Ubuntu 26.04 enables the solver3 dependency resolver by default for all apt CLI operations. Solver3 is a ground-up rewrite of APT’s dependency resolution logic that uses a SAT-solver-inspired approach with unit propagation, producing faster and more predictable results than the classic resolver. You can confirm it is active on your system with:
$ apt-config dump | grep -i solver
The output will show APT::Solver "3.0"; confirming solver3 is enabled.
What Solver3 Changes
In practical terms, solver3 brings several behavioral differences:
- Smarter dependency decisions – Solver3 better preserves the order of alternatives in dependency groups and handles complex conflict scenarios more reliably.
- More aggressive autoremove – The new solver only tracks the strongest dependency chain for each package. Consequently,
apt autoremovemay flag packages that the classic solver previously kept because they were reachable through weaker chains. - Upgrade by source package – Related binary packages from the same source are grouped and upgraded together, reducing partial-upgrade states.
- Automatic fallback – If solver3 fails to find a solution, APT automatically falls back to the classic internal solver and reports both outcomes, so you are never left without a resolution path.
When solver3 encounters a conflict it cannot resolve, it provides a detailed explanation showing exactly which packages conflict and why, making it easier to find a solution manually.
Reverting to the Classic Solver
If you encounter unexpected behavior during upgrades, you can bypass solver3 on a per-command basis:
$ sudo apt install package-name --solver internal
To revert globally to the classic solver, add the following configuration:
$ echo 'APT::Solver "internal";' | sudo tee /etc/apt/apt.conf.d/90solver
To restore the default solver3, simply remove that file:
$ sudo rm /etc/apt/apt.conf.d/90solver
IMPORTANT
Solver3 being the default is a vendor-specific decision by Ubuntu. Debian may use a different solver default depending on the release. For a detailed comparison of solver3 behavior, see What Is New in APT 3.1 on Ubuntu 26.04.
Querying Package Dependencies with apt why and apt why-not
The apt why and apt why-not subcommands are valuable additions to apt package management on Ubuntu 26.04. They answer the questions: “Why is this package installed?” and “Why is this package not installed?” These commands use solver3’s decision trace to provide clear explanations.
apt why
To find out why a package is selected for installation:
$ apt why bash
The output traces the dependency chain that requires the queried package. If the package was manually installed (i.e., you explicitly asked for it), apt why will indicate that directly.
apt why-not
Conversely, apt why-not explains why a package is not being installed:
$ apt why-not vim
If the package was never requested and no dependency chain pulls it in, the output will indicate it is undecided. If the package is actually installed, apt why-not will tell you so.
This command is particularly useful when troubleshooting upgrade scenarios where APT unexpectedly removes or holds back a package. Running apt why-not packagename during a full-upgrade simulation can reveal which conflict or dependency prevented installation.
Reverse Dependencies
Check why a library is installed on your system:
$ apt why libssl3t64
This will trace back through the dependency tree and show which explicitly installed package requires libssl3t64. Additionally, you can use this information to determine whether removing a particular package might break other software on your system.

To see all packages that depend on a given package (reverse dependencies), you can also use apt rdepends:
$ apt rdepends package-name
Advanced APT Package Management on Ubuntu 26.04
Beyond everyday install and remove operations, APT provides a rich set of features for fine-grained control over package management. This section covers advanced techniques that are essential for system administrators and power users.
Holding and Unholding Packages
Sometimes you need to prevent a specific package from being upgraded. This is common when a newer version introduces breaking changes or when you need to maintain a specific version for compatibility. Use apt-mark to hold a package:
$ sudo apt-mark hold package-name
A held package will be skipped during apt upgrade and apt full-upgrade operations. To list all currently held packages:
$ apt-mark showhold
To release the hold and allow upgrades again:
$ sudo apt-mark unhold package-name
Package Pinning and Priorities
Package pinning allows you to control which repository version of a package APT prefers when the same package is available from multiple sources. Pinning is configured through the /etc/apt/preferences.d/ directory.
Create a preferences file to pin a package:
$ sudo nano /etc/apt/preferences.d/example-pin
Example pin configuration that prevents a package from being installed from a specific repository:
Package: package-name
Pin: release o=ThirdPartyRepo
Pin-Priority: -1
Common pin priority values:
- 1001+ – Install this version even if it means downgrading
- 500 – Default priority for target release packages
- 100 – Default priority for installed and non-target packages
- -1 – Never install this version
To verify the effective pinning for a package:
$ apt-cache policy package-name
Downloading Packages Without Installing
To download a .deb package file without installing it, use the --download-only flag. The package will be stored in /var/cache/apt/archives/:
$ sudo apt install --download-only package-name
Alternatively, to download the .deb file to the current directory:
$ apt download package-name
Note that apt download does not require sudo privileges and saves the file to your current working directory.
Managing the APT Cache
APT stores downloaded .deb files in /var/cache/apt/archives/. Over time, this cache can consume significant disk space. To clean it:
Remove all cached package files:
$ sudo apt clean
Remove only outdated cached files (packages that can no longer be downloaded):
$ sudo apt autoclean

To check the current cache size:
$ du -sh /var/cache/apt/archives/
Reinstalling a Package
If a package’s files become corrupted or accidentally modified, you can reinstall it without removing it first:
$ sudo apt install --reinstall package-name
This is useful for restoring default configuration files or binary files to their original state.
Simulating Operations
Before executing a potentially disruptive operation, you can simulate it to see what APT would do without actually making changes:
$ sudo apt install --simulate package-name
The simulation output shows which packages would be installed, upgraded, or removed, allowing you to review the impact before committing.

Troubleshooting Common APT Issues
Even with careful management, you may occasionally encounter APT errors. This section covers the most common issues and their solutions for Ubuntu 26.04 systems.
Fixing Broken Packages
If a package installation was interrupted or a dependency is missing, your package database may be in an inconsistent state. Fix it with:
$ sudo apt --fix-broken install
This command attempts to resolve broken dependencies by installing missing packages or removing conflicting ones. If the issue persists, try:
$ sudo dpkg --configure -a
$ sudo apt --fix-broken install
Resolving Lock File Conflicts
If you see an error about the APT lock file being held by another process, it means another package manager instance is running:
ERROR MESSAGE
E: Could not get lock /var/lib/dpkg/lock-frontend
E: Unable to acquire the dpkg frontend lock
First, check whether another APT process is genuinely running:
$ ps aux | grep -i apt
If no legitimate process is running (for example, after a crash), you can safely remove the lock files:
$ sudo rm /var/lib/apt/lists/lock
$ sudo rm /var/lib/dpkg/lock-frontend
$ sudo rm /var/lib/dpkg/lock
$ sudo dpkg --configure -a
CAUTION
Only remove lock files if you are certain no other package manager process is running. Removing locks while another process is active can corrupt your package database.
Fixing GPG Key Errors
When adding third-party repositories, you may encounter GPG signature verification errors. The error typically looks like:
ERROR MESSAGE
W: GPG error:  resolute InRelease:
The following signatures couldn't be verified because
the public key is not available: NO_PUBKEY XXXXXXXXXXXXXXXX
To fix this, download and install the missing key:
$ sudo apt-key adv --keyserver keyserver.ubuntu.com --recv-keys XXXXXXXXXXXXXXXX
However, apt-key is deprecated on Ubuntu 26.04. The preferred approach is to download the key directly and store it in /usr/share/keyrings/, then reference it via the Signed-By field in your .sources file, as shown in the Managing Repositories section above.
Keyring Filename Restrictions in APT 3.1
APT 3.1 on Ubuntu 26.04 enforces stricter naming rules for key files in /etc/apt/trusted.gpg.d/. Filenames must now follow run-parts conventions: only letters (a-z, A-Z), digits (0-9), underscores, hyphens, and colons are permitted, with dots allowed only for the file extension. Characters like @ in keyring filenames will cause signature verification to fail during apt update even though the key material is valid.
If you encounter this issue after upgrading to Ubuntu 26.04 with third-party repositories, rename the offending file:
$ sudo mv /etc/apt/trusted.gpg.d/[email protected] /etc/apt/trusted.gpg.d/badname.gpg
Better yet, move the key to /etc/apt/keyrings/ and reference it with the Signed-By field in a DEB822 source entry, which avoids the global trust store entirely.
SECURITY NOTE
APT 3.1 also enforces stricter cryptographic policies. DSA keys and RSA keys smaller than 2048 bits are now rejected. If you see warnings about weak signatures during apt update, the repository maintainer needs to upgrade their signing key. See What Is New in APT 3.1 on Ubuntu 26.04 for details on the cryptographic policy tiers.
Resolving Hash Sum Mismatch
A hash sum mismatch error occurs when the downloaded package index does not match the expected checksum. This can happen due to mirror synchronization issues or network problems:
$ sudo rm -rf /var/lib/apt/lists/*
$ sudo apt clean
$ sudo apt update
This clears the local package index cache and forces APT to download fresh copies. If the error persists, try switching to a different mirror by editing your /etc/apt/sources.list.d/ubuntu.sources file and changing the URIs field.
Conclusion
APT 3.1.16 remains the cornerstone of package management on Ubuntu 26.04 Resolute Raccoon. With solver3 as the default dependency resolver, the DEB822 source format, diagnostic subcommands like apt why and apt why-not, repository-level Include/Exclude filtering, and apt modernize-sources, managing packages has become more structured and transparent. By mastering the essential and advanced techniques covered in this guide, you can efficiently install, update, and maintain software on your Ubuntu 26.04 system. For a deep dive into everything that changed in this APT release, see What Is New in APT 3.1 on Ubuntu 26.04. For further reference, consult the official APT man page and the Debian wiki on sources.list format.
Frequently Asked Questions
- What is the difference between apt and apt-get on Ubuntu 26.04? The
aptcommand is the recommended tool for interactive use. It combines the most common features ofapt-getandapt-cacheinto a single command with friendlier output, including a progress bar and color highlighting. Theapt-getcommand is still available and preferred for use in shell scripts because its output format is more stable and machine-parseable. - How do I convert my old sources.list file to the DEB822 format? Run
sudo apt modernize-sourcesto automatically convert all legacy.listfiles and the deprecated/etc/apt/sources.listfile into the DEB822.sourcesformat. The original files are preserved with a backup extension so you can revert if needed. - Is solver3 the default dependency resolver on Ubuntu 26.04? Yes. Ubuntu 26.04 enables solver3 by default for all
aptCLI operations. It provides faster dependency resolution and clearer error messages than the classic resolver. If you encounter unexpected behavior, you can revert to the classic solver with--solver internalon anyaptcommand. Additionally, if solver3 fails to find a solution, APT automatically falls back to the classic solver. - How can I find out why a particular package is or is not installed? Use
apt why package-nameto see the dependency chain that requires a package, orapt why-not package-nameto understand why a package is not being installed. These commands use solver3’s decision trace and are particularly useful when debugging unexpected package removals or hold-backs during upgrades. - How do I add a third-party repository on Ubuntu 26.04? Download the repository’s GPG key to
/usr/share/keyrings/, then create a.sourcesfile in/etc/apt/sources.list.d/using the DEB822 format with theSigned-Byfield pointing to the keyring. Finally, runsudo apt updateto refresh the package index. - What should I do if apt upgrade holds back packages? Packages are held back when upgrading them would require removing another installed package. Run
sudo apt full-upgradeto allow APT to remove packages if necessary to complete the upgrade. You can also useapt why-not package-nameto see exactly which conflict or dependency prevented the upgrade.
—
Meta Description: Master APT package management on Ubuntu 26.04 with apt commands, DEB822 sources, solver3, apt why, and repository management.
Focus Keyword: apt package management ubuntu 26.04
PakarPBN
A Private Blog Network (PBN) is a collection of websites that are controlled by a single individual or organization and used primarily to build backlinks to a “money site” in order to influence its ranking in search engines such as Google. The core idea behind a PBN is based on the importance of backlinks in Google’s ranking algorithm. Since Google views backlinks as signals of authority and trust, some website owners attempt to artificially create these signals through a controlled network of sites.
In a typical PBN setup, the owner acquires expired or aged domains that already have existing authority, backlinks, and history. These domains are rebuilt with new content and hosted separately, often using different IP addresses, hosting providers, themes, and ownership details to make them appear unrelated. Within the content published on these sites, links are strategically placed that point to the main website the owner wants to rank higher. By doing this, the owner attempts to pass link equity (also known as “link juice”) from the PBN sites to the target website.
The purpose of a PBN is to give the impression that the target website is naturally earning links from multiple independent sources. If done effectively, this can temporarily improve keyword rankings, increase organic visibility, and drive more traffic from search results.